This post may contain affiliate links. If you click and buy, we may earn a small commission at no extra cost to you. Learn more.
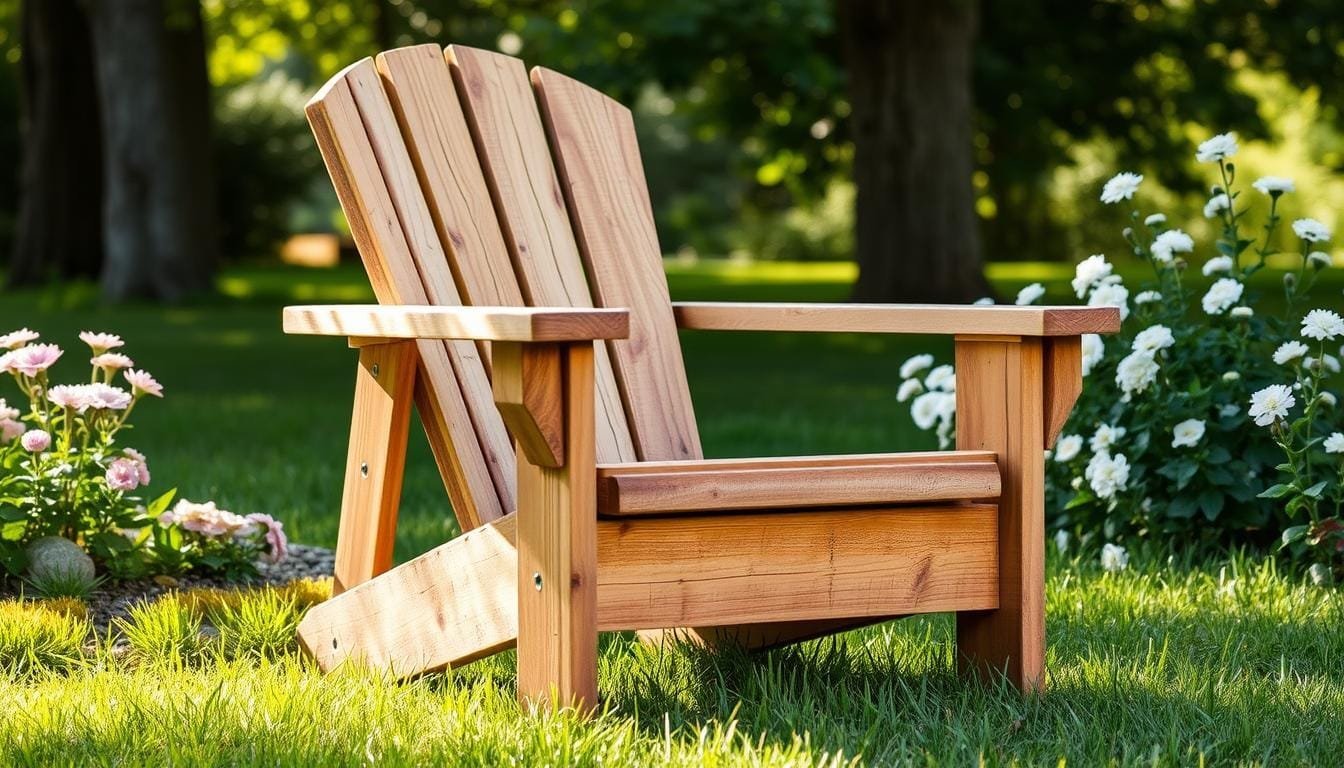
Welcome to our guide on making a stunning DIY Pallet Adirondack Chair for your outdoor area. Building a pallet Adirondack chair is a fantastic way to make unique and useful furniture from pallets. It’s perfect for those who want to add a personal touch to their outdoor decor.
A pallet Adirondack chair is also budget-friendly and eco-friendly for outdoor seating. You can make a beautiful and comfy chair for your backyard or patio. Our guide will show you how to build a DIY Pallet Adirondack Chair, with all the info you need to start.
Our guide is easy to follow, whether you’re a DIY pro or just starting out. We’ll give you step-by-step instructions and tips to make a stunning pallet Adirondack chair. It will be the talk of the town among your friends and family. So, let’s begin and make a beautiful DIY Pallet Adirondack Chair for your outdoor space.
Contents
- 1 Why Choose a DIY Pallet Adirondack Chair for Your Outdoor Space
- 2 Essential Tools and Materials Needed
- 3 Selecting and Preparing Your Pallets
- 4 Safety Considerations and Workspace Setup
- 5 Creating Your Pallet Adirondack Chair Template
- 6 Step-by-Step Construction Process
- 7 Adding Comfort Features to Your Chair
- 8 Finishing and Weather-Proofing Your Creation
- 9 Maintenance Tips for Long-Lasting Results
- 10 Creative Customization Ideas
- 11 Conclusion
- 12 FAQ
- 12.1 What are the essential tools and materials needed to build a DIY pallet Adirondack chair?
- 12.2 How do I select and prepare the pallets for my DIY Adirondack chair?
- 12.3 What safety considerations should I keep in mind when building a DIY pallet Adirondack chair?
- 12.4 How do I create a template for my DIY pallet Adirondack chair?
- 12.5 What are the steps involved in the construction process of a DIY pallet Adirondack chair?
- 12.6 How can I add comfort features to my DIY pallet Adirondack chair?
- 12.7 How do I finish and weather-proof my DIY pallet Adirondack chair?
- 12.8 What maintenance tips should I follow to ensure my DIY pallet Adirondack chair lasts?
- 12.9 What are some creative customization ideas for my DIY pallet Adirondack chair?
Why Choose a DIY Pallet Adirondack Chair for Your Outdoor Space
Choosing a DIY pallet Adirondack chair for your outdoor space is a smart move. It’s cheaper than buying chairs from stores and adds a unique, rustic charm. This makes your patio or backyard look better and more personal.
One big plus of a DIY pallet chair is how affordable it is. Pallets are easy to find and don’t cost much. Plus, using them is good for the planet. It helps reduce waste and saves resources.

- Cost-effective: A DIY pallet chair is a budget-friendly option that can save you money compared to buying a store-bought chair.
- Environmentally friendly: Upcycling pallets reduces waste and minimizes the demand for new materials, making it a sustainable option.
- Customization possibilities: A DIY pallet chair can be customized to fit your individual style and preferences, allowing you to create a unique piece of furniture that reflects your personality.
Cost-Effective Alternative to Store-Bought Chairs
A DIY pallet Adirondack chair is a smart choice instead of buying chairs. It brings a unique, rustic charm to your outdoor space. You can make it both functional and stylish, tailored to your needs.
Essential Tools and Materials Needed
To start your DIY pallet Adirondack chair, you’ll need some basic tools and materials. You’ll need a saw, drill, and sandpaper for woodworking. Also, gather a few pallets, depending on your chair’s design and size. Make sure you have a safe workspace and safety gear like gloves and glasses.
Having a detailed pallet furniture woodworking plans is key. It helps you stay organized and avoid missing important steps. You’ll need:
- Pallets (depending on the design and size of your chair)
- Woodworking tools (saw, drill, sandpaper, etc.)
- Safety equipment (gloves, safety glasses, etc.)
- A clear workspace
- A detailed plan and list of materials
With the right tools and materials, you can make a beautiful DIY pallet Adirondack chair. Always follow safety rules and use the right techniques for a successful project.

Selecting and Preparing Your Pallets
Choosing the right pallets is key for a homemade pallet Adirondack chair. You need pallets that are strong, in good shape, and without damage. This makes sure your chair is stable and safe.
Look for pallets made from wood, as it’s durable. Avoid those that show wear and tear.
After picking your pallets, clean and sanitize them. This removes dirt, debris, and bacteria. Use soap and water to clean, then let them dry before starting.
This step is important for safety. It makes sure your chair is clean and healthy to use.
How to Choose the Right Pallets
- Check for sturdiness and durability
- Look for pallets made from high-quality materials
- Avoid pallets with signs of wear and tear
Once your pallets are clean and sanitized, dismantle them safely. Use tools like a hammer and screwdriver. This way, you avoid injuries.

Cleaning and Sanitizing Methods
Cleaning and sanitizing your pallets is a must. You can use soap and water or bleach and water. Always wear gloves and eyewear for safety.
Safety Considerations and Workspace Setup
Building a DIY Pallet Adirondack Chair requires safety and a well-organized workspace. A clear, well-lit area without obstacles is key to avoiding accidents. Always wear gloves and safety glasses to protect yourself.
To ensure a safe workspace, consider these tips:
- Keep loose clothing and long hair tied back to avoid entanglement with power tools
- Ensure proper ventilation in your workspace to prevent inhalation of dust and fumes
- Use a push stick or other safety device when working with power tools to maintain control and prevent kickback
When starting your DIY Pallet Adirondack Chair, remember to follow safety rules with power tools. This will help you avoid mistakes and ensure a successful project. By focusing on safety and workspace setup, you’ll enjoy your new chair for many years.

By following these safety tips and setting up your workspace correctly, you’re on your way to making a beautiful DIY Pallet Adirondack Chair. It will be a great addition to your outdoor space.
Creating Your Pallet Adirondack Chair Template
To make a strong and comfy pallet Adirondack chair, you need a template. This step is key to making sure your chair fits right. It helps you mark your pieces and guides your cuts.
Think about what you want your chair to look like when you design it. Look for ideas online or get creative. Double-check your measurements to avoid mistakes.
Measurements and Angles
Measure your pallets carefully and figure out the angles. This makes sure your chair is both sturdy and comfy. Use online tools or ask a pro to check your numbers.

Marking Your Pieces
After making your template, use it to mark your pallet pieces. Label each piece so you know where it goes. Use a pencil or marker and a straightedge for straight lines.
Creating a Cutting Guide
A cutting guide is essential for cutting your pallets right. You can make one from cardboard or a template. Always cut safely and wear protective gear.
Step-by-Step Construction Process
To make a strong DIY pallet chair, start with the base. Then, move on to the backrest and armrests. Use the right tools and methods for a secure chair. Pre-drill holes for screws and use weather-resistant wood glue for strong joints.
When making your DIY pallet chair, follow these steps:
- Assemble the base using pallets and screws
- Attach the backrest and armrests, ensuring a comfortable and sturdy design
- Use sandpaper to smooth out any rough edges or splinters
A well-made DIY pallet chair can beautify any outdoor area. By following these steps and using the right materials, you can make a unique and comfy seating spot.

Always follow safety rules and use proper techniques with power tools when building your DIY pallet chair. With patience and practice, you can make a beautiful and useful outdoor piece of furniture.
Want even more detailed instructions and step-by-step plans? Check out this full guide on Instructables and these downloadable plans from Kreg Tool.
Adding Comfort Features to Your Chair
To make your rustic outdoor chair cozy, add comfort features. It becomes a perfect spot to relax after a long day. With a few simple changes, you can enjoy the ultimate outdoor seating.
Ergonomic adjustments are essential for comfort. You might adjust the backrest angle or add a footrest. Also, consider pillows or cushions for extra comfort and support.
Ergonomic Adjustments
- Adjust the angle of the backrest to a comfortable position
- Add a footrest to support your legs
- Consider adding armrests for extra comfort
Optional Cushioning Ideas
For more comfort, add cushions or pillows made from weather-resistant materials. They add comfort and protect your chair from the weather.

With these comfort features, your chair becomes a cozy outdoor space. It’s perfect for unwinding or hosting friends and family. Your rustic outdoor chair will be a favorite spot.
Finishing and Weather-Proofing Your Creation
To keep your DIY pallet Adirondack chair in top shape, focus on finishing and weather-proofing. Start by sanding the pallets to remove any rough spots or splinters. This makes the chair comfy and safe to sit on. Think about the wood type and its weather resistance when using pallet furniture woodworking plans.
Applying a protective coating is key to weather-proofing your chair. You can use sealants or stains to shield the wood from the weather and boost its look. Always read the instructions carefully for the best results. If you’re making your own pallet furniture woodworking plans, look into different treatments to find the best one for your project.
- Sanding techniques to achieve a smooth finish
- Protective coating options such as sealants or stains
- Weather-resistant treatments to enhance durability
Choosing and applying the right finishes can make your outdoor furniture last long and look great. This is true for any pallet furniture woodworking plans you might have.
Maintenance Tips for Long-Lasting Results
To keep your homemade pallet Adirondack chair in top shape, regular care is key. Check the chair for damage or wear and fix it if needed. This way, your chair stays strong and comfy for many years.
Some important maintenance tasks include:
- Regularly clean the chair to stop dirt and debris buildup
- Apply a new coat of sealant or stain to protect the wood and keep it looking good
- Store the chair in a dry, sheltered spot during winter to avoid damage from the weather
By following these easy maintenance tips, you can enjoy your homemade pallet Adirondack chair for a long time. Always handle it with care and fix any issues quickly to avoid more damage. With the right care, your chair will stay a cozy and stylish part of your outdoor area.
By taking the time to properly maintain your homemade pallet Adirondack chair, you can extend its life and keep it looking great. This will save you money and make sure your chair remains a cozy spot to relax and unwind.
Creative Customization Ideas
Building a DIY Pallet Adirondack Chair lets you get creative. You can make it your own, showing off your style. It’s a chance to create something special that stands out.
Start with the finish. Pick from many paints and stains to change how your chair looks. Go for a bold color or a natural stain to match your surroundings. Here are some ideas:
- Whitewash for a beachy vibe
- Gray or blue stain for a calm feel
- Bright colors like red or yellow for fun
Decorative Elements
You can also add special touches to your chair. Carvings or engravings on the arms or back add a unique flair. Decorative hardware can bring elegance. You might also want to add cup holders or armrests for more comfort.
Functional Add-ons
Think about adding features that make your chair more useful. Here are some ideas:
- Cup holders or trays for drinks
- Armrests or pillows for comfort
- A footrest or ottoman for a cozy spot
With these ideas, your DIY Pallet Adirondack Chair can be both unique and practical. It can show off your style and meet your needs. Whether you want color, elegance, or function, the options are endless.
Conclusion
As you finish your DIY pallet Adirondack chair, take a moment to admire it. This project lets you create unique outdoor furniture that shows your style. You’ve also saved money and helped the environment by using pallet materials.
Whether you keep it natural or paint it, you can customize it a lot. Try different stains, colors, and decorations to make it special. The fun is in making something beautiful by yourself.
Now, enjoy your new pallet Adirondack chair in your outdoor space. With the right care, it will last for many years. Happy relaxing!
Need more detailed plans? Check out this Instructables tutorial and Kreg’s official plans.
FAQ
What are the essential tools and materials needed to build a DIY pallet Adirondack chair?
To make a DIY pallet Adirondack chair, you’ll need basic tools like a saw, drill, and sandpaper. You’ll also need pallets, depending on your chair’s design and size. Make sure you have a clean workspace and safety gear like gloves and glasses.
How do I select and prepare the pallets for my DIY Adirondack chair?
Choose pallets that are sturdy and in good shape. Clean and sanitize them to remove dirt and bacteria. Then, use the right tools to dismantle them safely.
What safety considerations should I keep in mind when building a DIY pallet Adirondack chair?
Keep your workspace clear and well-lit. Wear gloves and safety glasses for protection. Always follow safety rules when using power tools.
How do I create a template for my DIY pallet Adirondack chair?
Creating a template is key for a well-made chair. Take precise measurements and calculate angles for stability. Mark your pieces and use a cutting guide for accurate cuts.
What are the steps involved in the construction process of a DIY pallet Adirondack chair?
Start by assembling the pallets according to your template. Begin with the base and move up to the backrest and armrests. Use the right tools and techniques, and sand the pallets for a smooth finish.
How can I add comfort features to my DIY pallet Adirondack chair?
To make your chair more comfortable, adjust the backrest angle or add a footrest. You can also use weather-resistant cushions for extra comfort.
How do I finish and weather-proof my DIY pallet Adirondack chair?
To protect your chair, sand it to remove rough edges. Then, apply a protective coating like sealant or stain to shield it from the weather.
What maintenance tips should I follow to ensure my DIY pallet Adirondack chair lasts?
Regularly check your chair for damage and fix it if needed. Store it in a dry place during winter. Apply a fresh coat of sealant or stain to keep it looking good.
What are some creative customization ideas for my DIY pallet Adirondack chair?
You can customize your chair by choosing different paints and stains. Add carvings or engravings for decoration. You can also add functional features like cup holders for extra comfort.
To bring you cozy inspiration more efficiently, we sometimes use AI to assist in content creation — but every word and idea is carefully shaped by our team. See our AI Disclosure for more info.